
P335
YAESU FT8900
VHF/UHF Transceiver – What you Need To Know
INTRODUCTION
The Yaesu FT8900 is a Quad Band HF – UHF FM transceiver. It is the companion to the FT8800 although in some ways it appears they were designed by two different people. It is a “TRUE” dual band radio and covers 10m, 6m, 2m and 70cm basically FM with 10m being FM narrow as per the band plan.
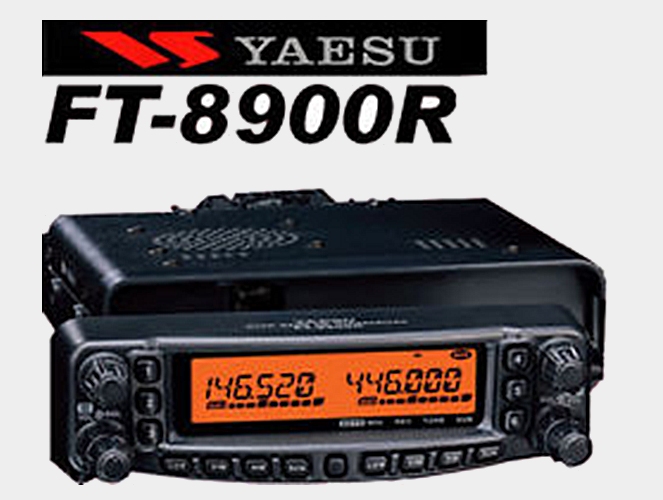
The radio is capable of 50w on 10, 6 and 2m plus 35w on 70cm and has front panel selection of lower power settings. It has 800 memory channels each of which is capable of saving the TX, RX, CTCSS, power setting and shift or split requirements.
The radio operates basically as Left hand and Right hand side of the radio. There are 2 separate transceivers built inside and each will operate on its own except that the Left side will handle all 4 bands and the Right hand side will not handle 10m or 6m. With this exception, all memory channels are selectable from either side of the radio.
The alphanumeric display allows easy viewing of frequency in VFO mode or memory channel number or label in memory mode.
1. POWERING ON AND OFF
Press the bottom right volume knob for about 1/2 second to turn the radio On or Off. A user settable power off timer (1 – 12 hrs) can be set in program mode also.
2. BAND SELECTION
Switching from one side of the radio to the other is easily done by briefly pressing the dial knob for the side to be selected.
Changing bands when in VFO mode is performed by pressing the dial knob for about 1 second while in the VFO mode. Each time the dial knob is long pressed, the band is changed.
For the Left side – 144 MHz _ 350 MHz _ 430 MHz _ 850 MHz _ 29 MHz _ 50 MHz _ 144 MHz.
For the Right side – 144 MHz _ 430 MHz _ 144 MHz.
This may vary depending on the country that the radio is sold into.
Note:
One thing that every person who owns or operates one of these radios finds out is that sometimes you press the volume knob instead of the dial knob to change sides. If you press the bottom left volume knob by mistake, you may notice the word “INET” appear on the display. This will switch on a DTMF tone that transmits annoyingly each time you press the PTT. Each operator takes a while to figure out what has caused the tone to suddenly start transmitting but once found is never forgotten.
3. MODULATION MODE SELECTION
Not required as this is principally an FM radio even though it will demodulate AM.
4. SELECTING A VFO FREQUENCY
Press the V/M knob on the Left or Right side of the radio to be changed.
Pressing this alternates between VFO (V) and Memory (M).
The display will show the band that is currently selected for that side of the radio – see above about Band Selection to change to the desired band.
After selecting VFO mode, fast MHz selection is achieved by pressing the dial knob on which ever side is to be controlled then select the MHz required. Press the same dial knob again then select the KHz required.
A frequency or memory channel may be directly dialled by entering the digits using the microphone keypad depending on which mode is selected – Memory or VFO.
5. SAVING & RECALLING MEMORY FREQUENCIES
In VFO mode, set up the desired frequency, tone requirements (CTCSS etc), power setting, TX Offset (if req’d) then press the centre “Set” button for half a second. The display will show the next available free channel number in which to store your settings. You can select a different channel location if desired by rotating the dial knob before pressing the centre “Set” button again.
To recall a memory channel, set to Memory mode (V/M button) then rotate the dial to the channel desired or dial the channel number on the microphone keypad.
6 SETTING REPEATER OFFSETS
More easily done via program mode, the offsets (or Shift) can be changed before a memory is saved or the TX and RX frequencies can be entered separately.
Also more easily done via PC program mode, split operation can be programmed for non standard TX and RX frequencies.
7. SETTING SUBAUDIBLE TONES (CTCSS)
Although CTCSS settings can be changed by pressing button combinations on the front panel, as all else on this radio, it is easier to switch to program mode, select the Item “Tone M” for tone mode, then make the changes there.
8. ADJUSTING POWER OUTPUT
Briefly press the appropriate “Low” button to step through the power settings for that side of the radio. 4 settings are available.
SPECIAL COMMENTS
- Squelch operation is separate for each side and is controlled by the outer ring of the volume controls.
- Hyper memories (6) are very handy being able to save whatever is happening on each side of the radio at that time. To recall a memory setting, briefly press the hyper memory button.
- Cross-Band repeater function is available.
- DATA connection for APRS or other digital modes is also standard on these radios.
- The microphone has 4 buttons that can be programmed for special functions such as “reverse” or main side change.
- Press and hold the “low” button to toggle the display between text and frequency for that memory channel on that side of the radio.
- Scanning of memories or bands or groups of memories is an available feature.
- Programming is simple via the front panel or via PC cable using inexpensive software. To enter program mode via the front panel, briefly press the centre “Set” button. Rotate the dial knob on the side of the radio being changed to select the setting required. Most settings are displayed in understandable text if the user has performed the operation previously. Press the dial knob, release then rotate it to change the options for the selection chosen. Once a setting has been changed, pressing the dial button will step back to the main programming menu then pressing the Set button will drop back to operating mode.
- Other great programmable features include mute for the other side when TXing and selection of either internal or extension speakers for each side of the radio.
- Remote head operation is by standard telephone line cord extension cable.
- There is a Time Out Timer – for operators looking to gain the “long over award”. This is useful if you accidentally sit on the microphone in the car and operate the PTT (it happens – believe me)
- The FT8900R has but one antenna connection in either “N” or “UHF” types. Mobile antennas are available in tri or quad band format that work very well. There are also duplexers available to allow you to connect a separate antenna for each band.
10. SUMMARY
The FT8900R has been around for quite some years now but is still very relevant and is an exceptional radio. It is quite easy to use and very reliable.
Download this document as a PDF

